


Latest & Greatest

Air Fryer Garlic Parmesan Wings Tasty and Simple Recipe
If you’re craving a tasty snack, these Air Fryer Garlic Parmesan Wings are the answer! This simple recipe combines juicy
Read more…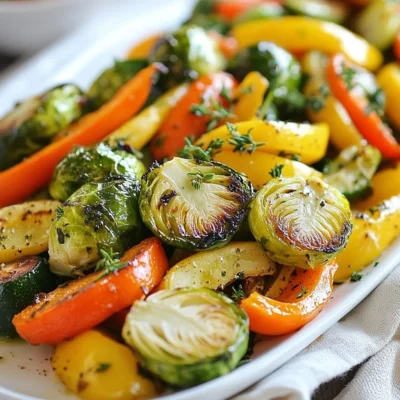
Garlic Herb Butter Roasted Vegetables Tasty Treat
Ready to elevate your veggie game? My Garlic Herb Butter Roasted Vegetables will do just that! With a mix of
Read more…
Mango Coconut Overnight Oats Tasty and Simple Recipe
Looking for a refreshing breakfast that’s simple and tasty? Try my Mango Coconut Overnight Oats! This easy recipe combines creamy
Read more…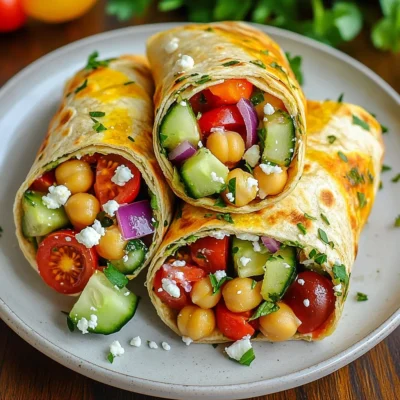
Mediterranean Chickpea Wraps Packed with Flavor
Looking for a meal that’s both delicious and easy? Mediterranean Chickpea Wraps are here to save the day! These wraps
Read more…
Raspberry Dark Chocolate Muffins Soft and Tasty Treat
Craving a sweet treat that’s soft, tasty, and easy to make? You’re in for a delight with these Raspberry Dark
Read more…
Sweet Hawaiian Chicken Skillet Quick and Tasty Meal
Looking for a quick, tasty meal that’s bursting with flavor? The Sweet Hawaiian Chicken Skillet is your answer! This dish
Read more…
Pumpkin Spice Latte Cupcakes Delightful Fall Treat
If you’re craving a sweet way to celebrate fall, these Pumpkin Spice Latte Cupcakes are the answer! With rich flavors
Read more…
Cinnamon Apple Crumble Muffins Irresistible Delight
Cinnamon Apple Crumble Muffins are a sweet hug in a muffin form. With warm spices and fresh apples, they promise
Read more…browse recipes


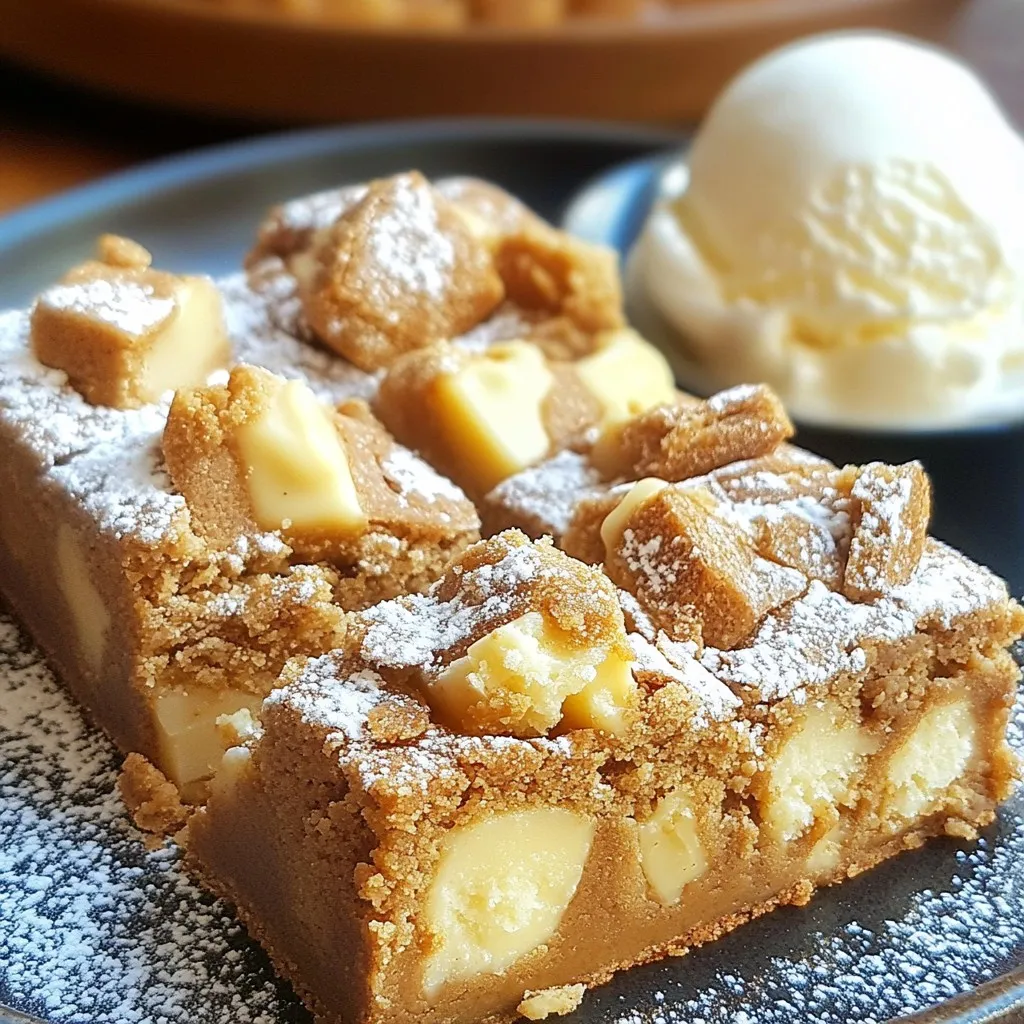
Cookie Butter Blondies Irresistible and Easy Treat
If you’re looking for a sweet treat that’s simple to make, you’re in the right spot! These Cookie Butter Blondies are rich, gooey, and…
My Latest Desserts
My Latest Recipes

hey,
i’m !
I’m so happy you’re here!
Cooking is my love language, and I’m excited to share my best dishes with you. Hope they become your favorites too! Let’s enjoy every bite of this journey together.
![- 4 medium green tomatoes - 1 cup buttermilk - 1 cup all-purpose flour - 1 cup cornmeal - 1 teaspoon paprika - 1/2 teaspoon garlic powder - 1/2 teaspoon onion powder - 1/2 teaspoon cayenne pepper (optional) - Salt and pepper to taste - Cooking spray or olive oil for drizzling The right ingredients make the best oven-fried green tomatoes. Green tomatoes are firm and tart. They provide a great base for this dish. You will need fresh, unripe tomatoes for the best flavor. The buttermilk helps the coating stick and adds a nice tang. The flour and cornmeal create the crispy texture. Paprika, garlic powder, and onion powder add depth to the flavor. Cayenne pepper gives a bit of heat, but you can skip it if you prefer a milder taste. Salt and pepper round out the flavors perfectly. - Gluten-free options: You can use gluten-free flour instead of all-purpose flour. This will still give you a great crunch. - Vegan substitutions for buttermilk: Simply mix one cup of plant-based milk with one tablespoon of vinegar or lemon juice. Let it sit for a few minutes to thicken. This works well in place of buttermilk and keeps your dish vegan-friendly. These alternatives make the recipe accessible for everyone. Don't hesitate to experiment with different flavors and textures! For the full recipe, check the details above. To start, slice your green tomatoes. Use a sharp knife for clean cuts. Aim for 1/4 inch thick rounds. This thickness helps them cook evenly. Next, preheat your oven to 425°F (220°C). This high heat helps the tomatoes crisp up nicely. Line your baking sheet with parchment paper. This makes clean-up easy and prevents sticking. Now, it's time to coat the tomato slices. First, pour buttermilk into a shallow dish. Dip each slice into the buttermilk. Let any extra drip off. Then, move the slice to another dish with the flour mix. This mix includes flour, cornmeal, and spices. Press lightly to ensure an even coating. Make sure each slice is well-covered. This step is key for great flavor and texture. Place the coated slices on the baking sheet. Make sure to space them out evenly. This helps them bake uniformly. Lightly spray the tops with cooking spray or drizzle with olive oil. This will help them crisp up. Bake in the preheated oven for 20-25 minutes. Flip the slices halfway through. This ensures both sides get crispy. When they are golden brown, they are ready. Remove from the oven and let them cool a bit before serving. Enjoy your crispy, delicious oven-fried green tomatoes! For the complete recipe, check the full recipe section. To make tasty oven-fried green tomatoes, you need the right ones. Look for firm tomatoes with a bright green color. They should feel heavy for their size. Avoid ones with blemishes or soft spots. You can find fresh green tomatoes at local farmers' markets or grocery stores. Ask your vendor if they have any in stock. Spacing on the baking sheet is key. If the slices are too close, they will steam and not crisp up. Leave space between each slice. This helps air circulate and makes them crunchy. Use cooking spray or drizzle olive oil on top. This adds flavor and helps with the crispiness. Soggy tomatoes are a common issue. To prevent this, make sure to coat them well in the flour mixture. Let any excess buttermilk drip off. Overcooking or undercooking can ruin your dish. Aim for a golden brown color, which takes about 20-25 minutes. Flip them halfway through to ensure even cooking. Enjoy your crispy treats! For the full recipe, check [Full Recipe]. {{image_2}} You can spice up your oven-fried green tomatoes in fun ways. For a kick, try adding more heat. Mix in cayenne pepper or crushed red pepper flakes. You can also use smoked paprika for a smoky taste. If you love herbs, consider adding dried oregano or thyme. These will give your tomatoes a fresh, fragrant twist. A good dip makes everything better! For a classic touch, whip up homemade ranch dressing. Simply mix buttermilk, mayo, garlic powder, and herbs. You can also make a creamy remoulade. This sauce combines mayo, mustard, and spices for a zesty flavor. Both options pair perfectly with your crispy tomatoes. When serving oven-fried green tomatoes, think about side dishes that complement them. Coleslaw adds crunch and freshness, while a light salad brightens the plate. For a fun twist, stack the tomatoes in a tower with layers of thinly sliced vegetables. This makes for an eye-catching presentation. You can also garnish with fresh herbs for a pop of color. Try these ideas to make your dish stand out! To keep your oven-fried green tomatoes fresh, store them in an airtight container. Place parchment paper between layers to prevent sticking. Refrigerate your leftovers within two hours of cooking. For longer storage, you can freeze them. Make sure to use freezer-safe bags or containers. When reheating, use an oven or air fryer. This keeps them crispy. Set your oven to 375°F (190°C) and heat for about 10 minutes. In the fridge, your crispy green tomatoes last about 3-5 days. If frozen, they can stay good for up to three months. Always check for spoilage before eating. Signs include a mushy texture or an off smell. If you notice these signs, it's best to discard them. Enjoy your oven-fried green tomatoes while they're fresh! To keep your oven-fried green tomatoes crispy, focus on moisture. Here are some tips to control moisture: - Choose firm tomatoes: Look for tomatoes that are bright green and firm. - Pat them dry: Before coating, pat the slices with a paper towel to remove excess moisture. - Use a wire rack: Place the coated tomatoes on a wire rack while they rest. This allows air to circulate and keeps them dry. - Don't overcrowd the pan: Give each slice space on the baking sheet. This helps them crisp evenly. Yes, you can prep them ahead of time. Here are some suggestions for making them in advance: - Slice and coat: You can slice and coat the tomatoes a few hours ahead. Just cover them and keep them in the fridge. - Bake when ready: Bake them right before serving for the best texture. - Store after baking: If you have leftovers, store them in an airtight container. Just know they may lose some crispness. If you need a buttermilk substitute, there are easy options: - Milk and vinegar: Add 1 tablespoon of vinegar or lemon juice to 1 cup of milk. Let it sit for 5 minutes. - Yogurt: Thin plain yogurt with a bit of water until it reaches a similar consistency to buttermilk. - Non-dairy milk: Use almond milk or soy milk with a splash of vinegar for a dairy-free option. This blog post covered the essentials for making oven-fried green tomatoes. We discussed ingredients, preparation, cooking methods, and variations. With tips on selecting tomatoes and avoiding common mistakes, you now have the tools to succeed. Remember, it’s all about finding the right balance of flavors and textures. Keep experimenting to discover your favorite versions. Enjoy your crispy treats with the right dip and side. Happy cooking!](https://recipespursuit.com/wp-content/uploads/2025/04/384b33cc-2284-4747-b3ef-c1d84f3fb3e8-300x300.webp)


Creamy Tuscan Gnocchi Delightful and Easy Recipe
Ready for a cozy meal that’s both delightful and easy to make? In this recipe, I’ll guide you on how to create a creamy…
. Enjoy your cooking! To keep your gnocchi from turning mushy, use a large pot of boiling salted water. Only cook the gnocchi until they float, usually 2-3 minutes. After cooking, drain them well. Avoid letting them sit in water. If you want variations, try pan-frying them for a crispy texture. This adds a nice contrast to the creamy sauce. To bring out more flavor, consider adding crushed red pepper flakes or a pinch of nutmeg. These spices can elevate the dish. Fresh herbs like basil and parsley add brightness. Chop them finely and stir them in just before serving. This keeps their flavor fresh and vibrant. For sides, a simple arugula salad with lemon vinaigrette works well. It balances the creaminess of the gnocchi. You can also serve garlic bread to soak up the sauce. For wine, a crisp white like Sauvignon Blanc pairs perfectly. It complements the richness of the dish without overpowering it. For a full recipe of Creamy Tuscan Gnocchi, be sure to check out the complete instructions above! {{image_2}} If you want a gluten-free version of creamy Tuscan gnocchi, use gluten-free gnocchi. Many brands offer this option. You can find them in grocery stores. Check the label to ensure they meet your needs. Adjust cooking methods if you use gluten-free gnocchi. Cook them according to the package instructions. Keep an eye on the texture, as they can cook faster than regular gnocchi. Adding protein can make this dish even better. You can use chicken, shrimp, or a vegetarian option like chickpeas. For chicken, chop it into bite-sized pieces. Cook it in the skillet before adding the garlic. Cook for about 5-7 minutes until it’s no longer pink. If you prefer shrimp, add them after the tomatoes. Cook for about 3-4 minutes until they turn pink. For a vegetarian twist, toss in cooked chickpeas or lentils. They add protein and pair well with the creamy sauce. You can easily change the vegetables in this recipe based on what’s fresh. In spring, try asparagus or peas. In fall, use butternut squash or kale. Incorporating seasonal herbs can also brighten the dish. Fresh basil works well, but you can also use parsley or thyme. Just add them at the end for the best flavor. For more details on the full recipe, visit the Full Recipe section. To keep your creamy Tuscan gnocchi fresh, store leftovers in an airtight container. This helps prevent moisture loss and keeps flavors intact. You can keep it in the refrigerator for up to three days. If you need to store it longer, consider freezing it. In the freezer, it can last for up to three months. When reheating, the goal is to maintain texture and flavor. The stovetop is the best method. Simply add a splash of water or broth to your gnocchi and warm it over low heat. Stir often to ensure even heating. If you choose the microwave, use a microwave-safe dish. Heat in short bursts, stirring in between, to avoid hot spots. Creamy sauces can be tricky to freeze. They can separate when thawed. To prepare your creamy sauce for freezing, let it cool completely. Then, transfer it to a freezer-safe container. When you’re ready to use it, thaw it in the fridge overnight. Reheat slowly on the stovetop, adding a little cream or broth to help restore creaminess. You can use both store-bought and homemade gnocchi. Store-bought gnocchi is quick and easy. You can find it in most grocery stores. It cooks fast and tastes great. Homemade gnocchi offers a fresh taste. It can be made with potatoes or ricotta. If you love cooking, try making your own! To make this dish dairy-free, swap heavy cream for coconut cream or cashew cream. Use nutritional yeast instead of Parmesan cheese for a cheesy flavor. There are also many plant-based cheese options available. These swaps keep the dish creamy and tasty without dairy. Yes, you can make this dish ahead of time. Cook the gnocchi and sauce separately. Store them in airtight containers in the fridge. When you're ready to eat, combine them and heat on the stove. This method keeps the gnocchi from getting mushy. You can also freeze the dish, but the texture may change. For the best taste, I recommend making it fresh. For the full recipe, click here! In this post, we explored how to make creamy Tuscan gnocchi. We covered ingredients, cooking methods, and tips for perfecting this dish. From sautéing vegetables to making a rich sauce, each step matters. I shared variations for dietary needs and storage tips for leftovers. Remember, cooking is fun and flexible. Feel free to adjust as you like. Enjoy your cooking adventure with creamy Tuscan gnocchi!](https://recipespursuit.com/wp-content/uploads/2025/07/d60eff59-53a2-4d2d-a692-01878c85ab0b.webp)
